> ## Documentation Index
> Fetch the complete documentation index at: https://io.net/docs/llms.txt
> Use this file to discover all available pages before exploring further.
# Deploy Kubernetes
> Run and manage containerized applications with Kubernetes.
Kubernetes is an open-source container orchestration platform that automates deployment, scaling, and management of applications. It abstracts away infrastructure complexity so you can focus on building and running applications efficiently across distributed environments.
## Kubernetes for GPU Workloads and Machine Learning
#### Kubernetes is particularly effective for machine learning (ML) and high-performance computing (HPC) workloads, where GPU acceleration is critical. It offers:
* Dynamic GPU resource allocation for efficient workload distribution.
* Auto-scaling to optimize GPU utilization based on demand.
* Containerized ML environments for reproducibility and modularity.
* Resource isolation to prevent contention between workloads.
This guide outlines connecting to and interacting with a Kubernetes cluster using `kubectl` to manage GPU-accelerated workloads.
## To deploy a Kubernetes Service:
This guide walks you through creating and managing a Kubernetes cluster on the platform. Each step is designed to help you configure the environment according to your needs - whether for development, training, or production workloads.
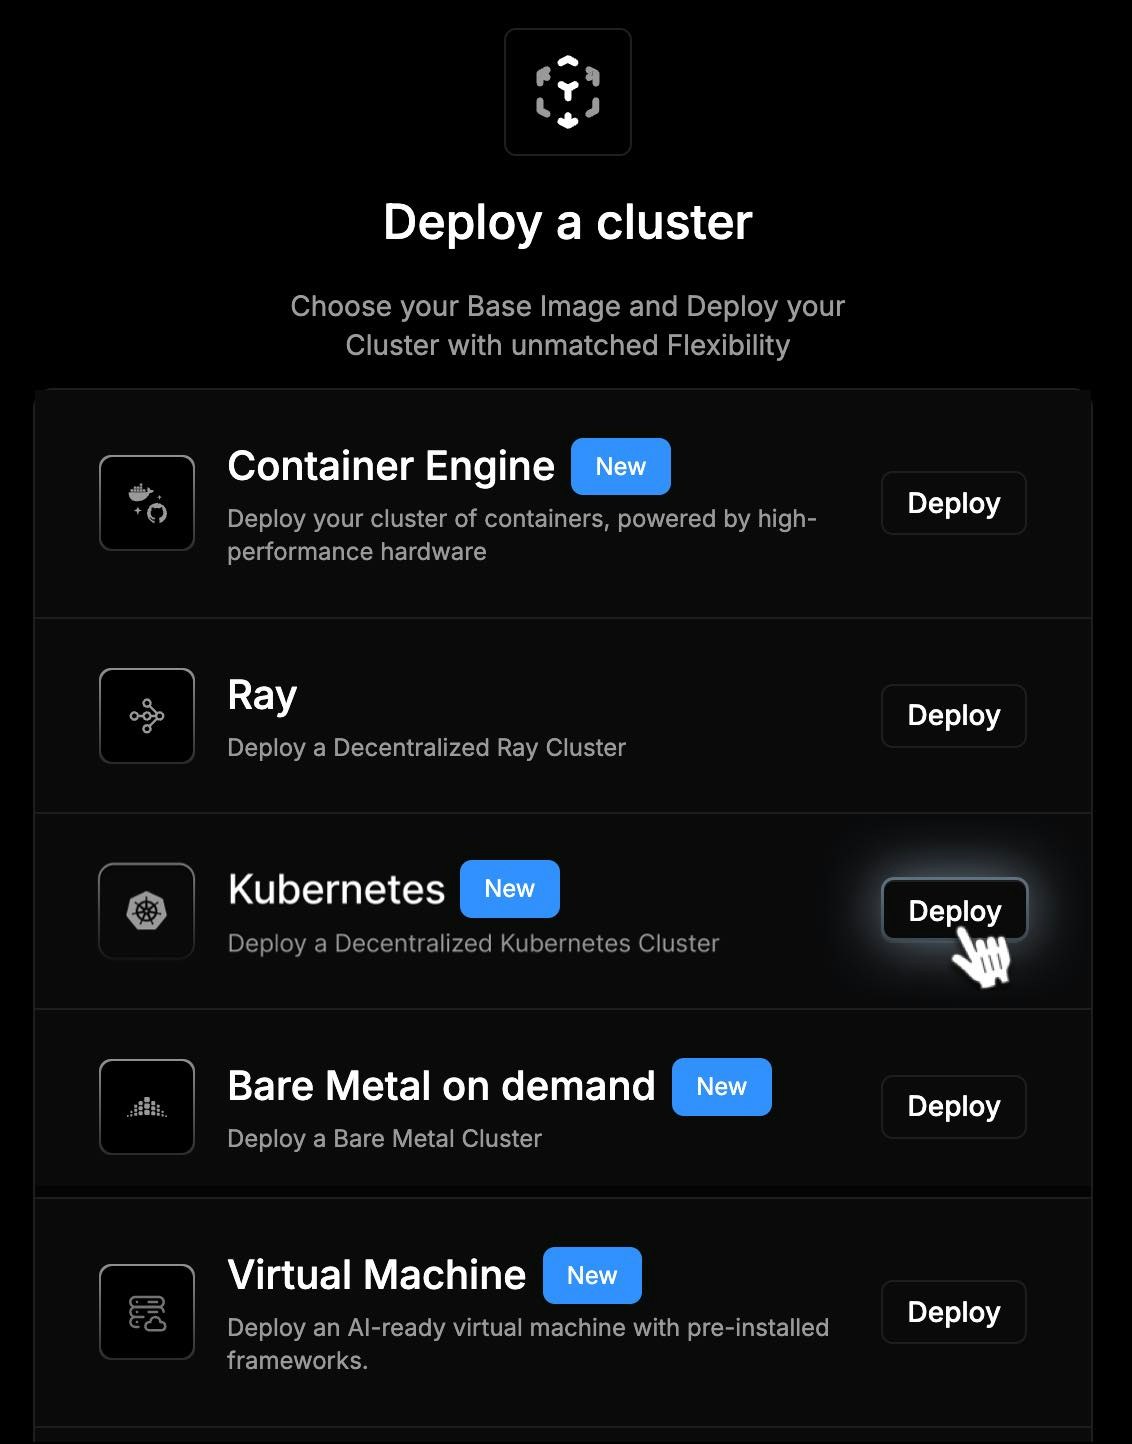
### 1. Create Your Cluster
From the cluster creation menu, choose Kubernetes. This will launch the setup wizard for your dedicated compute environment.
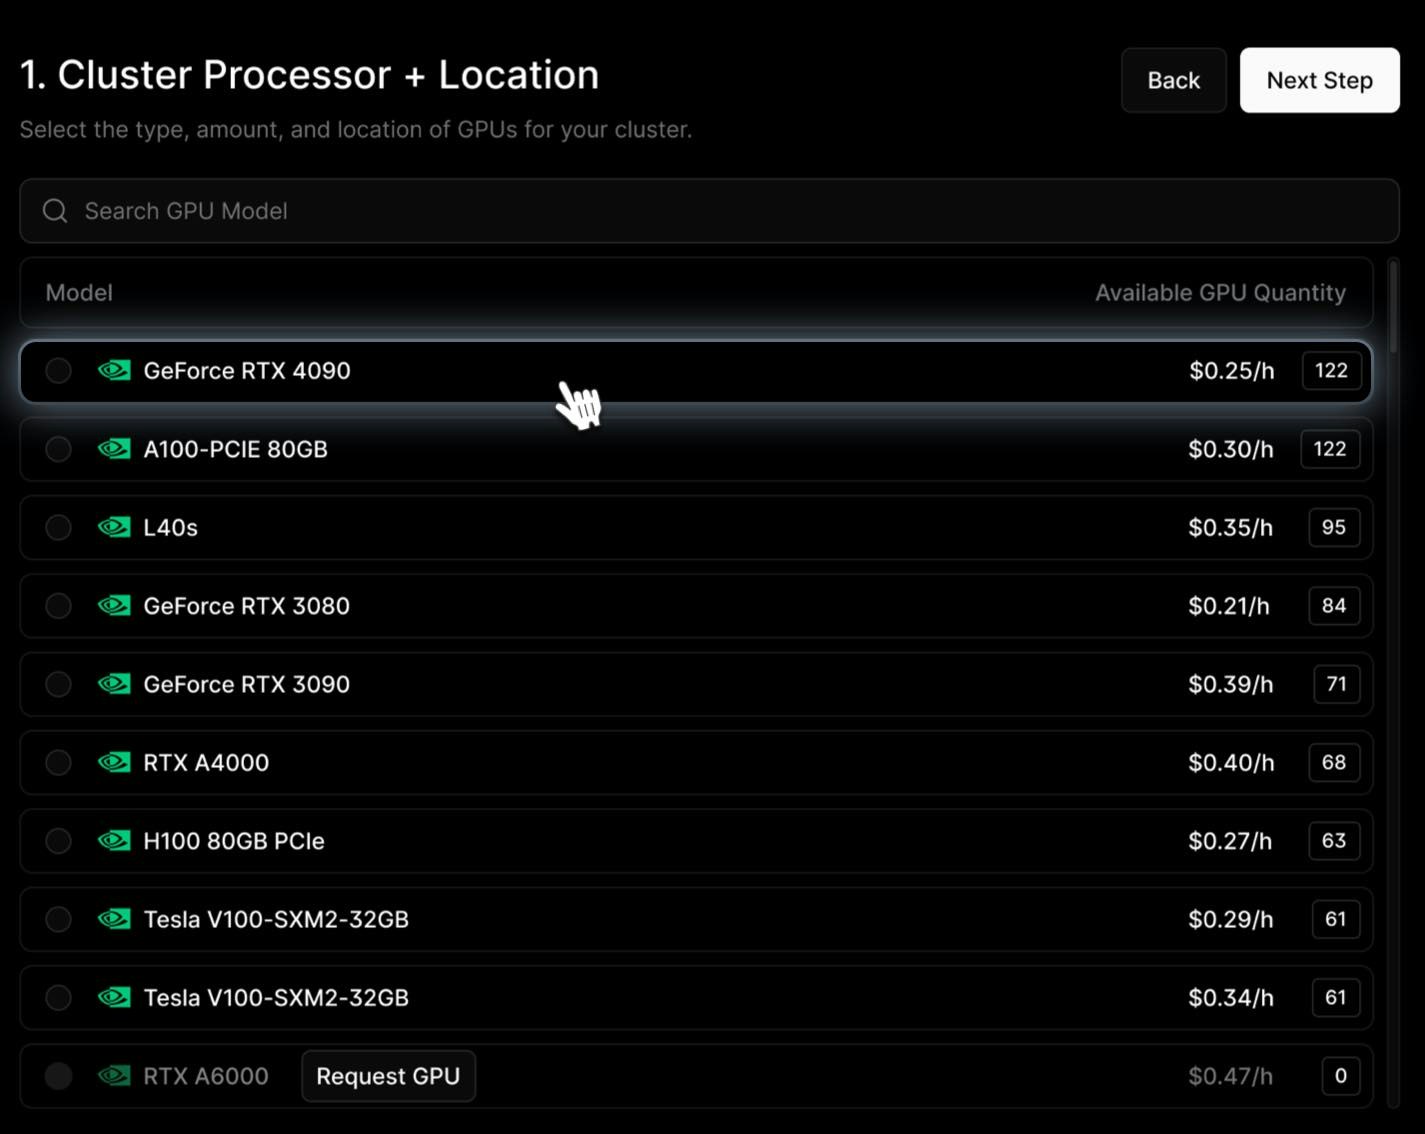
 ### 2. Select Processor
Decide which hardware will power your cluster:
* Search among supported **CPUs/GPUs**.
* Pick your preferred **supplier**.
* Set the **number of processors** based on your workload requirements.
### 2. Select Processor
Decide which hardware will power your cluster:
* Search among supported **CPUs/GPUs**.
* Pick your preferred **supplier**.
* Set the **number of processors** based on your workload requirements.
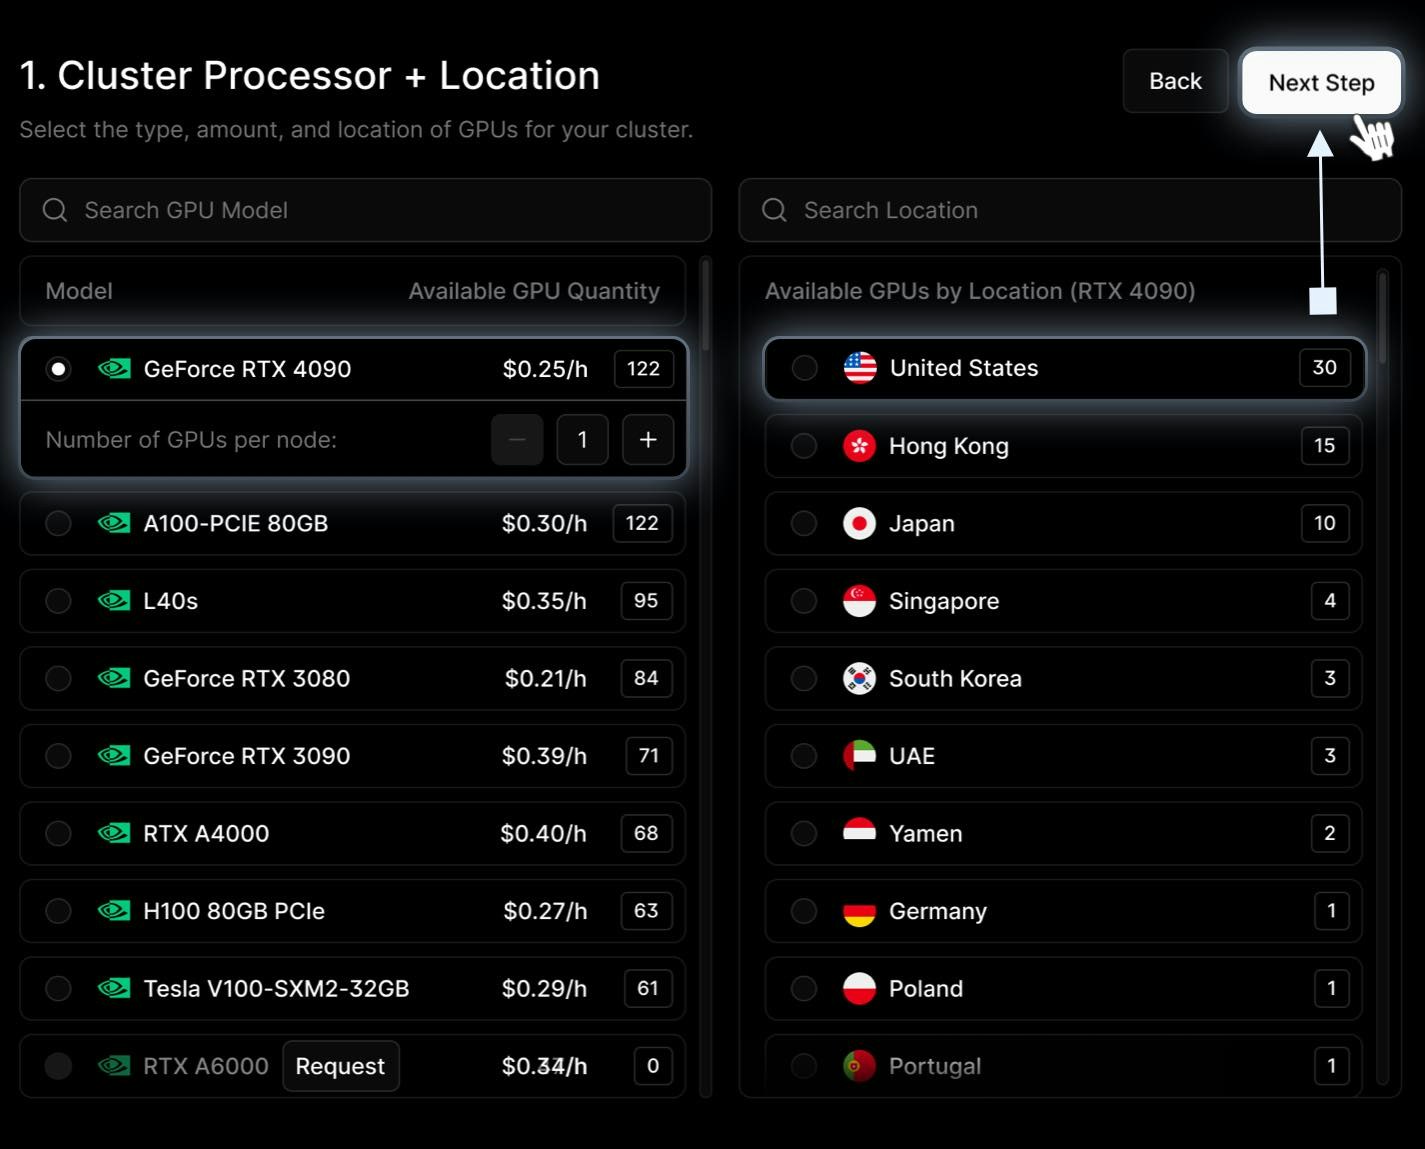
 ### 3. Choose Location
Pick the region where your cluster will run.
* Locations depend on aggregated node availability.
* You can also search for a specific location if needed.
### 3. Choose Location
Pick the region where your cluster will run.
* Locations depend on aggregated node availability.
* You can also search for a specific location if needed.
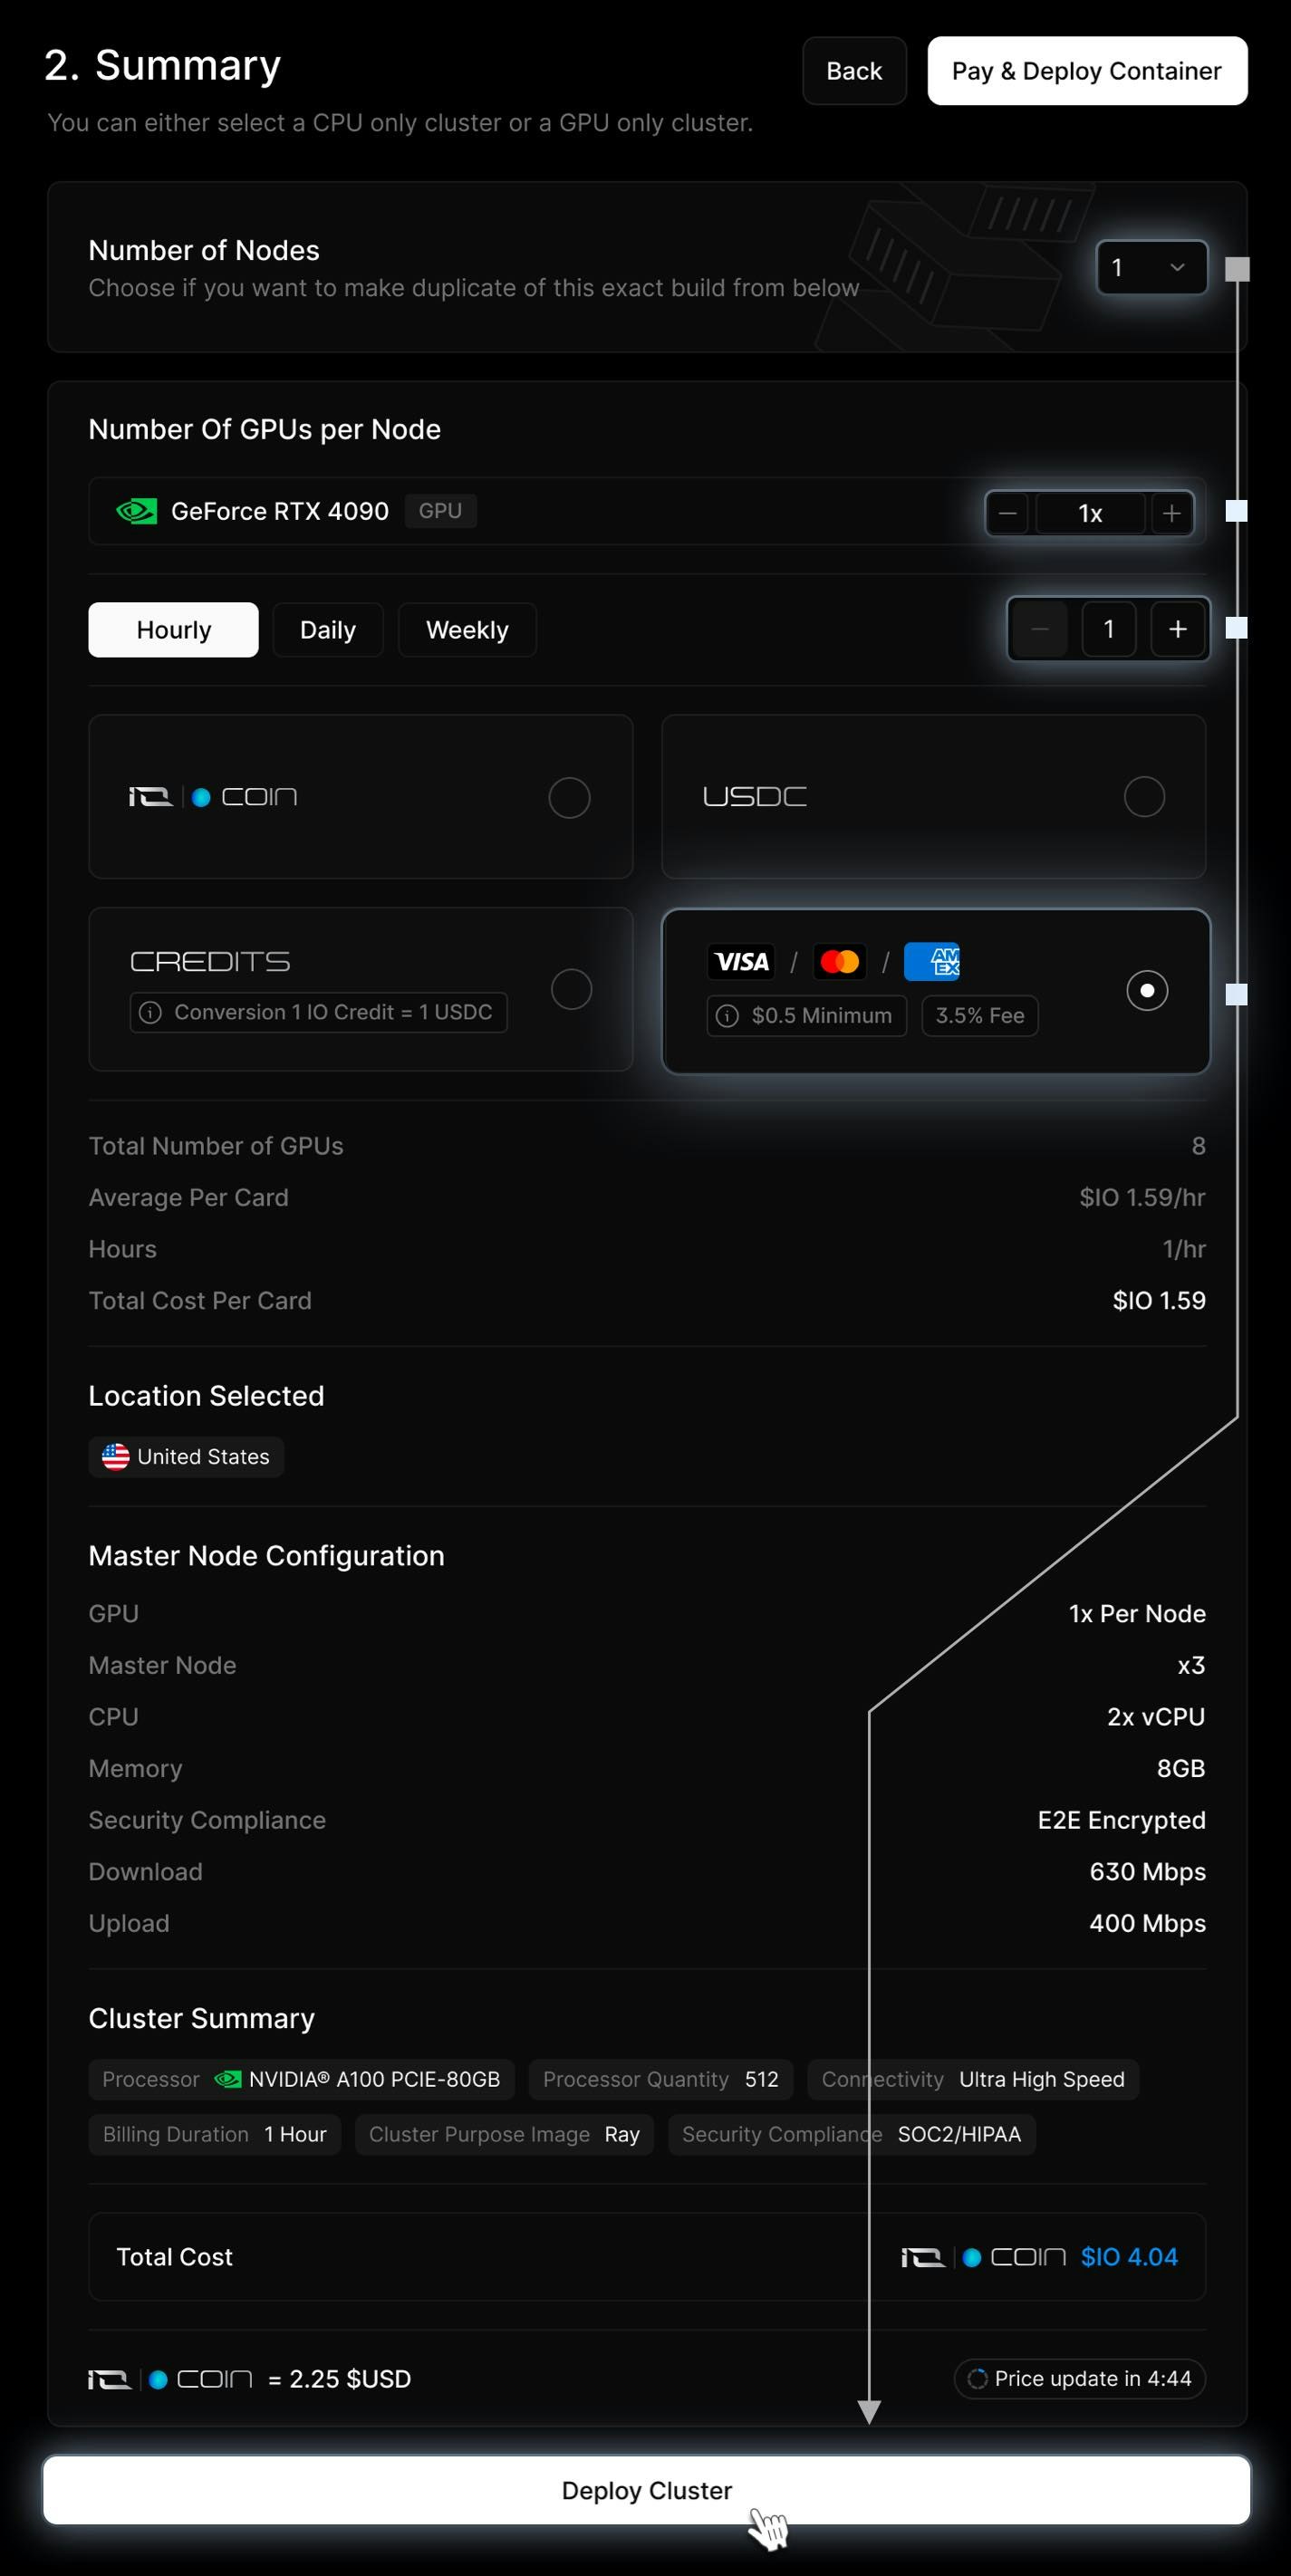
 ### 4. Review & Deploy
On the summary screen, confirm your configuration:
* **Number of Nodes** – how many machines will be part of your cluster. More nodes increase scalability and fault tolerance.
* **Number of GPU/CPU per Node** – the hardware resources allocated to each node. This defines the processing power available for your workloads.
* **Runtime Duration** - hourly, daily, or weekly (in hours)
* **Payment Method** - choose from **IO Coin**, **USDC**, **USD** or **IO Credits**
* **Master Node Configuration** - define the resources for your master node, including **GPU** (if required), number of CPUs, memory allocation, and any additional configuration settings.
At the bottom, you’ll see an **estimated total cost.** When ready, click **Deploy** to provision your Kubernetes cluster.
### 4. Review & Deploy
On the summary screen, confirm your configuration:
* **Number of Nodes** – how many machines will be part of your cluster. More nodes increase scalability and fault tolerance.
* **Number of GPU/CPU per Node** – the hardware resources allocated to each node. This defines the processing power available for your workloads.
* **Runtime Duration** - hourly, daily, or weekly (in hours)
* **Payment Method** - choose from **IO Coin**, **USDC**, **USD** or **IO Credits**
* **Master Node Configuration** - define the resources for your master node, including **GPU** (if required), number of CPUs, memory allocation, and any additional configuration settings.
At the bottom, you’ll see an **estimated total cost.** When ready, click **Deploy** to provision your Kubernetes cluster.
 ### View and Manage Your Cluster
After payment and provisioning, your cluster becomes available in the dashboard.
From the **Cluster Details** page, you can:
* Monitor **real-time resource usage**
* Access **SSH connection details**
* Control lifecycle – **pause, resume, or terminate**
* Review **billing and usage insights**
Use **Return to Clusters** to see all active clusters or start a new deployment.
IMAGE
> 📘 Note: Please be aware that Kubernetes Cluster is still in beta stage, so some more advanced features are not yet available.
### Next Step: Expose Your Applications
Once your Kubernetes cluster is deployed on [IO.net](http://io.net), the next step is making your applications accessible from outside the cluster. This is done using **Ingress**.
> 📘 For detailed instructions, see [**Kubernetes Ingress Setup**](https://io.net/docs/guides/clouds/kubernetes-ingress-setup) — covering Ingress controllers, routing, DNS, and SSL configuration on [IO.net](http://io.net).
## Connect to Your Kubernetes Cluster
To interact with your cluster, you'll need `kubectl`, the Kubernetes command-line tool. Ensure you have valid cluster credentials, which are typically provided as a `kubeconfig` file.
### Configuring `kubeconfig`
Your `kubeconfig` file contains authentication details and configuration settings for cluster access. You can set it up in two ways:
1. Using the export command:\
`export KUBECONFIG=/path/to/your/kubeconfig`
2. Moving it to the default location\
`mv /path/to/your/kubeconfig ~/.kube/config`
Once set up, your system will automatically detect the configuration file.
**Verifying Cluster Access**
After configuring kubeconfig, verify connectivity with the cluster:
`kubectl cluster-info`\
`kubectl version`
These commands show cluster details and verify the compatibility between the client and server versions.
### Essential `kubectl` Commands
Once connected, utilize `kubectl` to manage and monitor your workloads efficiently.
**Retrieve Cluster Namespaces**
`kubectl get ns`
**List All Pods Across Namespaces**
`kubectl get pods --all-namespaces`
**View Deployments in a Specific Namespace**
`kubectl get deployments --namespace `
**Describe a Deployment**
`kubectl describe deployment --namespace `
**View Pod Logs**
`kubectl logs -l =`
These commands offer insights into cluster status, workloads, and logging, which are essential for debugging and performance tuning.
### Explore Advanced kubectl Documentation
For deeper insights into Kubernetes operations, refer to:
* [kubectl Overview](https://kubernetes.io/docs/reference/kubectl/overview/)
* [Getting Started with kubectl](https://kubernetes.io/docs/tasks/tools/install-kubectl/)
* [kubectl Cheat Sheet](https://kubernetes.io/docs/reference/kubectl/cheatsheet/)
* [kubectl Reference](https://kubernetes.io/docs/reference/generated/kubectl/kubectl-commands/)
Utilizing these resources can enhance your Kubernetes workflow for GPU-accelerated workloads and ML applications.
### View and Manage Your Cluster
After payment and provisioning, your cluster becomes available in the dashboard.
From the **Cluster Details** page, you can:
* Monitor **real-time resource usage**
* Access **SSH connection details**
* Control lifecycle – **pause, resume, or terminate**
* Review **billing and usage insights**
Use **Return to Clusters** to see all active clusters or start a new deployment.
IMAGE
> 📘 Note: Please be aware that Kubernetes Cluster is still in beta stage, so some more advanced features are not yet available.
### Next Step: Expose Your Applications
Once your Kubernetes cluster is deployed on [IO.net](http://io.net), the next step is making your applications accessible from outside the cluster. This is done using **Ingress**.
> 📘 For detailed instructions, see [**Kubernetes Ingress Setup**](https://io.net/docs/guides/clouds/kubernetes-ingress-setup) — covering Ingress controllers, routing, DNS, and SSL configuration on [IO.net](http://io.net).
## Connect to Your Kubernetes Cluster
To interact with your cluster, you'll need `kubectl`, the Kubernetes command-line tool. Ensure you have valid cluster credentials, which are typically provided as a `kubeconfig` file.
### Configuring `kubeconfig`
Your `kubeconfig` file contains authentication details and configuration settings for cluster access. You can set it up in two ways:
1. Using the export command:\
`export KUBECONFIG=/path/to/your/kubeconfig`
2. Moving it to the default location\
`mv /path/to/your/kubeconfig ~/.kube/config`
Once set up, your system will automatically detect the configuration file.
**Verifying Cluster Access**
After configuring kubeconfig, verify connectivity with the cluster:
`kubectl cluster-info`\
`kubectl version`
These commands show cluster details and verify the compatibility between the client and server versions.
### Essential `kubectl` Commands
Once connected, utilize `kubectl` to manage and monitor your workloads efficiently.
**Retrieve Cluster Namespaces**
`kubectl get ns`
**List All Pods Across Namespaces**
`kubectl get pods --all-namespaces`
**View Deployments in a Specific Namespace**
`kubectl get deployments --namespace `
**Describe a Deployment**
`kubectl describe deployment --namespace `
**View Pod Logs**
`kubectl logs -l =`
These commands offer insights into cluster status, workloads, and logging, which are essential for debugging and performance tuning.
### Explore Advanced kubectl Documentation
For deeper insights into Kubernetes operations, refer to:
* [kubectl Overview](https://kubernetes.io/docs/reference/kubectl/overview/)
* [Getting Started with kubectl](https://kubernetes.io/docs/tasks/tools/install-kubectl/)
* [kubectl Cheat Sheet](https://kubernetes.io/docs/reference/kubectl/cheatsheet/)
* [kubectl Reference](https://kubernetes.io/docs/reference/generated/kubectl/kubectl-commands/)
Utilizing these resources can enhance your Kubernetes workflow for GPU-accelerated workloads and ML applications.